


Whether you already have a Wix website or are planning to build there, creating a Wix membership site isn’t hard. We’ve got the steps laid out for you to start selling membership on Wix.
For purposes of this guide, we won’t address web design in Wix. Wix offers a detailed guide and video tutorials on the process. So before you start to use Wix for a membership site, the first step is to build your website pages in Wix. Some of the basic pages might include: home, about us, contact, member join, member login, event calendar, member directory, and a page that gets into the details and benefits of your memberships.
At this point don’t worry about not having your membership signup form, events calendar, member directory, or a Wix member login. An empty page will do for those until you go to step 2. If your site is already live, you can hide any empty pages from the navigation menu until you’re ready to launch.
Step 1: Choose a Wix Member App
Wix offers the ability to charge for memberships and subscriptions through their Wix website membership. It’s designed for solopreneurs and small businesses who want to restrict access to content. As your organization grows, you will likely need additional member management features that Wix doesn’t offer. That’s where a Membership Management App like MembershipWorks comes in. For instance you may want to:
- Accept an offline payment method such as checks. Associations and chambers of commerce often have members that need invoices generated to prompt their accounting department to write a check.
- Offer group or family memberships where there is more than one user on the member account. For example, a pickle ball club might have two members within a household who want to buy a couples or family membership. Or a trade association might provide corporate memberships that allow multiple employees belong.
- Provide an option for members to pay all of their outstanding invoices all in one place.
- Customize your membership confirmation email.
- Easily process refunds and track all financial activity in one place.
To choose your Wix paid membership app, get clear about the features you need such as:
- Member billing and online/offline payment
- Ability to screen or approve members
- Message and field customization
- Membership types needed (group, individual, etc.)
- Members only content
- Wix member directory
- Wix job board
- Member and non-member event registration
- Software integrations
Having fully-featured membership management software like MembershipWorks enables you to leverage integrated features to your advantage and keep track of member activity across multiple areas of your site. Note that when you use a separate membership app, it typically will not integrate with Wix’s site members system.
Step 2: Set up Your Payment Gateway in Your Members App
 You might already have an account with Stripe, PayPal, Authorize.net or another payment gateway. Check with your membership app or plugin to see what payment processors they integrate with. You may want to take a look at the transaction fee schedule for each provider to make the right choice for your type of membership organization. Once you have your gateway account established, typically you’ll need to enter information into your membership software to tie the two together. Note that some gateways offer a nonprofit transaction fee rate.
Step 3: Add Memberships in Your Membership App
MembershipWorks offers a seamless way to add in landing pages on your Wix member site for your:
- Wix members area,
- Member login,
- Member signup form,
- Event calendar,
- Member directory, and more.
It’s as easy as copying and pasting HTML snippets into a Strip in Wix. No code knowledge is needed. Pro tips:
- Put the member signup form high on your join page so that no scrolling needed to see it. Save lengthy descriptive text for another page earlier in the membership sales funnel.
- On pages where you are collecting money, don’t have videos, ads, repeating animations or other things that may make sound or motion on the page that may cause the user to be distracted or annoyed.
- Don’t include a lot of links on your join page as you don’t want prospective members to head elsewhere. Keep their attention focused on one thing — filling out that form and entering their credit card information.
While some membership apps provide stand alone pages and forms, you don’t want prospective members to be confused or not feel secure when they are taken away from your Wix members site to a separate site to complete their transaction. MembershipWorks keeps your current and prospective members on your website.
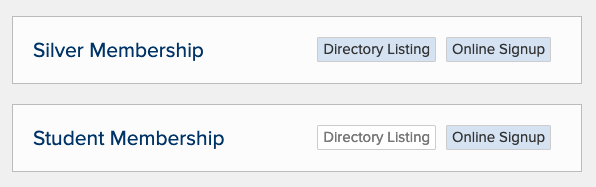
Step 4: Set up Your Membership Levels
Many organizations offer more than one membership level. You’ll create each of these levels in MembershipWorks. You should be able to customize your welcome message and renewal notice emails. You’ll also set up billing options and decide what to charge for dues or subscriptions.
Membership pricing can be tricky. You don’t want to charge so little that you can’t cover your costs. You also don’t want to charge more than the market will bear. It’s important to communicate the benefits and value of each membership option. Pro tips:
- Set a free trial or set up discount codes for new or returning members to encourage signups and renewals.
- When offering automatic recurring payments, be sure to include text that clearly communicates that the charges will reoccur. Recurring payments can increase revenues when members “set it and forget it.” However, you don’t want to incur the wrath of angry members or the hassle of chargebacks if they didn’t understand that would happen.
- Do you need to accept checks for memberships? Evaluate the demographics of your members and staff time when making these decisions. Some older members may only want to pay by check, but recording checks takes more administrative time.
 Finally you’ll want to set up renewal notices and welcome messages for each membership level. Tips:
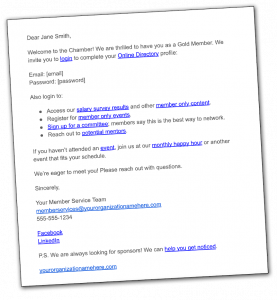
- Write a robust welcome letter that informs about member benefits; it can also include the member’s login and password information. Members who just joined are more primed to read emails from you, so don’t miss this opportunity to reinforce their decision to sign up.
- If you offer different membership levels, make sure each welcome letter is customized to mention the benefits that are only available to that level. Let your new members at higher pricing levels know that they are getting something exclusive. This might prevent someone from downgrading later.
- Renewal notices will remind members when it is time to renew and can also be set to send when a member goes past due. It’s always a good idea to customize the default system messages. For instance, don’t miss an opportunity to sell the value of the membership again when you send out renewal notices. Don’t leave members asking, “What have you done for me lately?” Keep them informed about the benefits of membership at renewal time and all year long.
Step 5: Categorize and Import Your Members
If you already have members
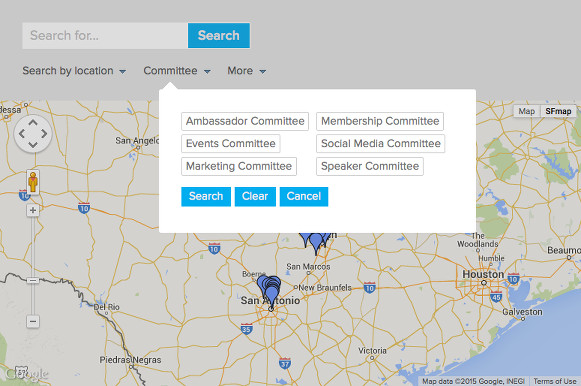
Your members can usually be categorized beyond their membership level. For instance, a chamber of commerce website might want to provide a business directory with various categories like restaurants, lodging, tourist attractions, and more. Your membership management software will allow you to tag, label, or otherwise categorize these businesses. You may also want to make it possible for members to label themselves. Whether you tag their business category for a public member directory or label a member for internal administrative reasons such as a committee membership, it’s a good idea to create labels for them before you import them. Then current members can be imported with their labels already applied.
When it’s time to import your members, review the sample import spreadsheet that MembershipWorks provides. You may need to rename your spreadsheet columns to align with the names for the system fields. You will also want to create any custom fields you need before you undertake your import. Don’t hesitate to ask for support during this process if you get stuck.
If you don’t have members yet
If you are starting from scratch with no members yet, make sure you create labels or tags in MembershipWorks in case you want to allow your new members to categorize themselves. Learn more.
Step 6: Set up Your Forms
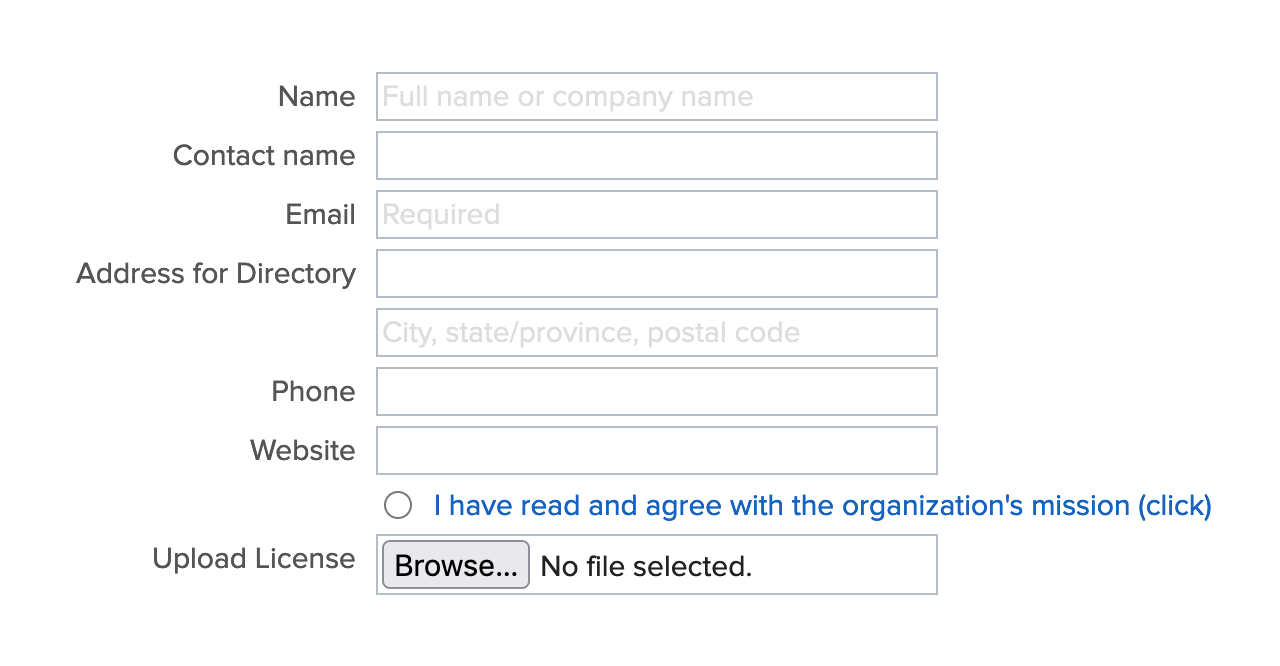
Create a Member Join Form in Wix
Your membership plugin will likely provide a default membership signup form, but you may want to remove any fields that don’t apply and add your own relevant custom fields. Avoid asking for too much information on the join page. If prospects see a really long form, they may get overwhelmed and think it will take too much of their time to fill out. Save your detailed questions for after you have collected payment.
Allow Members to Login and Manage Their Account
Members will also need a way to manage their profile. Their member profile form is what a typical member might see after logging into their account. There they can add information to their directory profile, edit contact information, update their credit card details, and see their payment history. If you offer a directory, members can upload images and add details about their business. They can choose their privacy options. You can also decide whether members should be able to add additional users to their account such as family members or coworkers.
Step 7: Announce Your Wix Membership Site
If you have existing members, you’ll want to spread the word about the new features that they can now enjoy. You should create a website announcement email that includes:
- A list of features they can enjoy on the your membership site
- Clear instructions on how to obtain their password to login
- A message of thanks for their membership
If you are just beginning to promote your Wix paid membership site, you can use your email marketing platform to send out a message to prospective members. If you have a LinkedIn group, Facebook group, or other way of communicating with prospects, be sure to reach out there as well. See these ideas for creative ways to announce your site and build membership enrollment. Creating a short video that discusses the benefits of membership is a good idea as it can be shared on your website and social media accounts.
FAQ
What is Wix membership site pricing?
Wix Membership and Website
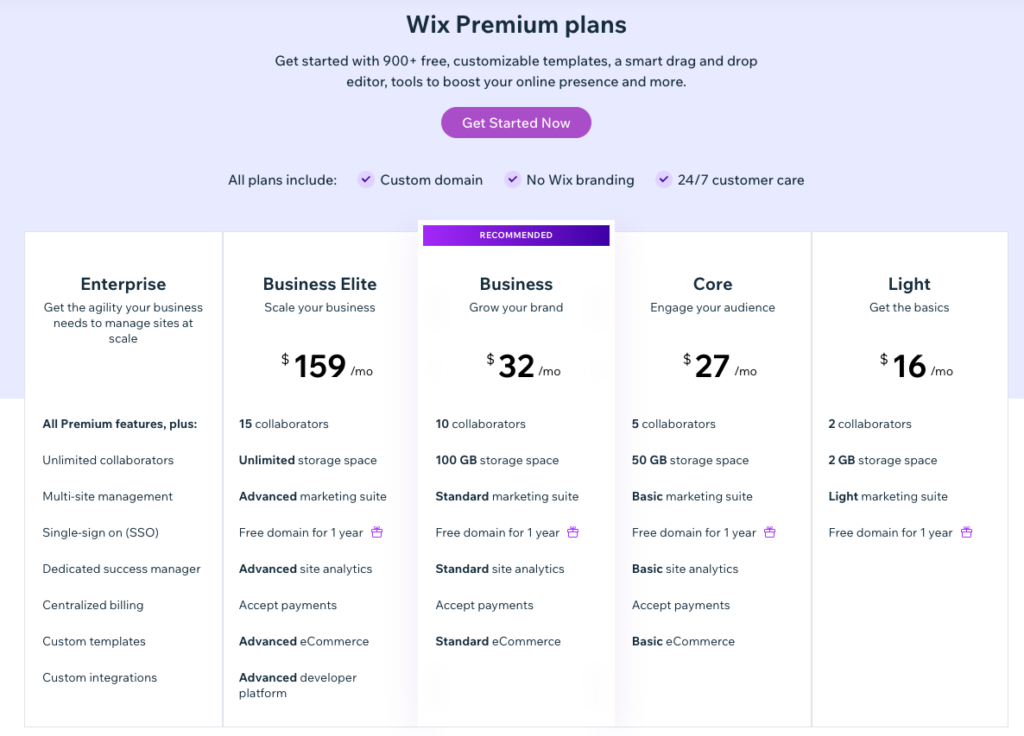
If you are using Wix’s built-in membership features, you’ll need to sign up for their Core or higher level plans. That’s because you can’t have payment processing on their cheapest plan. Wix membership site prices start at $27 per month for the cheapest plan with online payment processing. As we mentioned at the beginning of the article, the membership features within Wix are more limited than they are if you use a membership management app like MembershipWorks.
Wix Website + Membership Management App
If you are using membership management software like MembershipWorks in combination with a Wix website, you’ll need a Wix Premium (paid) plan. The entry-level price for a Wix Premium plan $16 per month. MembershipWorks offers a free plan that allows up to 50 members, although not all features are available on that plan. The monthly price for the lowest level paid MembershipWorks plan is $35 per month.
Note that pricing and features may change from the information we have gathered here. Providers regularly evolve their product offerings and price points.
Comments are closed.